Anonymization, Transportation & Storage
Medical Imaging data is generated from scanners. Depending on the type of project, data can come from various centers and in various formats/sequences. The first step would be to harmonize scanning protocols. In most cases data acquisition happens out of our control. DICOM (Digital Imaging and Communications in Medicine) is the international standard to transmit, store, retrieve, print, process, and display medical imaging information in general. Before a data arrives at the XNAT storage after it is generated, it is recommended that protected patient health information is stripped out for security reasons.
Our infrastructure uses a tool named CTP (Clinical Trial Processor) developed by the Radiological Society of North America (RNSA) to remove protected health information from the dicom images. The CTP software acts as DICOM Processor and can recieve images using the DICOM protocol. By defining processing pipelines and anonymization scripts, we can guarantee a consistent anonymization. We also use the processing pipeline to make sure the data gets transported securely over the internet (https) and ends up in the correct project on XNAT (by setting the patient comments).
Note
Sending data to a CTP can be done by the PACS systems of the hospitals, by applications from you local machine like osirix or by using command line tools like ‘dcmsend’. In this demo, we will make use of the python package pynetdicom.
Follow the following steps to see how our infrastructure uses CTP to anonymize data and sends it to XNAT storage.
From the main landing page go to the CTP webpage and login using credentials:
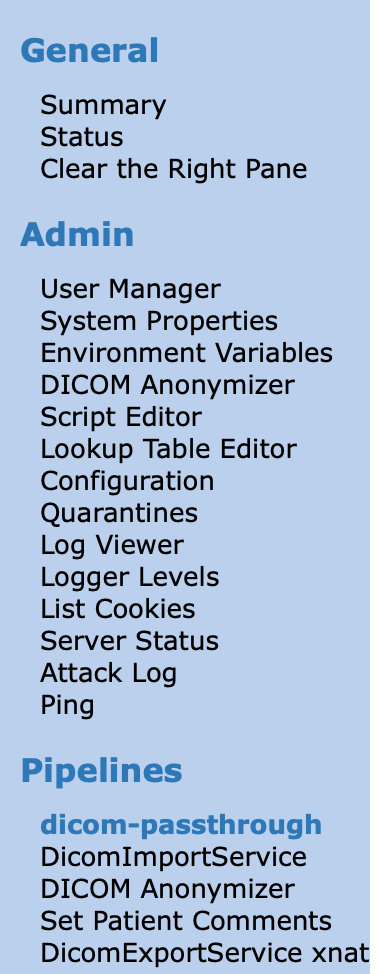
king:password. On the left panel you will find a menu, on the bottom of which you will find the pipeline we will use for this demo. It contains four steps that each DICOM file will have to go through.DicomImportService: This is used to import data. It listens to port 1181 for incoming data.
DICOM Anonymizer: This step is used to anonymize the data. You can check the anonymization script and lookup Table.
Set Patient Comments: This step is used to set XNAT specific info and is used to make sure the data is named correctly and sent to the corresponding project.
DicomExportService: This step sends the data to the XNAT using the DICOM protocol. Be aware that for demo purposes this is fine, but the DICOM protocol is not secured in this case and might need to be revised for real life applications.
Note
Please have a look at the DICOM Anonymizer and check how the anonymization script works. It is located at DICOM Anonymizer –> edit the anonymizer script (In the middle of the screen)
Next, go to the jupyter notebook and run the code (use
Shift + ENTER) in the cell labeled “Anonymization”. Since we are not currently connected to a scanner/PACS, we will send a dicom image from our machine to the CTP server. For this demo, we are using python (pynetdicom, pydicom) to send the data.Note
You should see blue progress bar filling up (If it’s already green it is finished sending the data)
You can track the progress by going back to the CTP service webpage. Here, you should be able to see the import and export queues of the dicom-passthough pipeline.
If the previous steps were working correctly you should see the data arriving in XNAT, depending on the project settings and the time elapsed the data can either be in pre-archive or already be archived to the project. So in XNAT go to the project page and see if there is any data is there. If there’s no data you can use the menu on the right to go to the prearchive of the project. If all the data was send by the CTP we can continue with the archiving of the data, this might have happenned automatically if you have waited long enough.
Note
You can force the archiving of a session in the prearchive using
block
3.1 Archiving data using xnatpy
in the Jupyter Notebook.